
I am a big fan of make your own foods as even casual readers of this blog will notice, and pizza dough is no exception. It’s been a while since we made pizza, which is a shame because it’s pretty fun and easy. I was happy to see this recipe for No-Knead Pizza Dough in the March issue of Bon Appétit magazine which I have to say I am impressed with every month. The quality of photography and recipes are really great. Although I may not make every recipe (last month’s focus on Southern Food was a bit of a miss for me) there is plenty of inspiration and this month was no exception.
This recipe makes six large individual pizzas. Looking at the article it seems the recipe was meant to be used at a make your own pizza party. Instead my husband and I ended up making all six but giving away two to neighbours, saving two for next day’s lunch, and eating two that night. It was great, but my only gripe was with each pizza cooking 15 minutes, we ended up having the oven heated at 500F for over an hour. Next time, I’d try cooking two at a time or during the summer I’d try and use the barbecue. I’d also try halving the recipe to make it more manageable.
This is a recipe that has to be started well in advance. I started mine the morning before the day we wanted to eat.
No-Knead Pizza Dough
from Bon Appétit’s March 2012 issue
Makes six large individual serving pizzas
Start making this recipe the day before you intend to eat!
7 1/2 cups (1000 grams) flour
4 tsp fine sea salt
1/2 tsp active dry yeast
The Dough
- Whisk above three ingredients in a medium bowl and slows add 3 cups water
- Stir until well incorporated
- Mix dough with hands into a rough ball. Dough will be pretty shaggy still. Don’t expect it to be smooth.
- Put into a large bowl, cover with plastic wrap and let rise at room temperature until surface is covered with bubbles and dough has more than doubled in size. This is 18 hours minimum (I left mine for over 24 hours)
- Transfer dough to a floured work surface, shape into a rough rectangle and divide into 6 portions.
- Working with 1 portion at a time, gather four corners to centre to create a ball. Turn upside down so seams are on the bottom, set on a floured surface, and continue with the rest of the portions doing the same thing.
- At this point you can let the dough rest another hour and then continue with the pizzas, or you can wrap each doughball in plastic wrap and chill for up to 3 days. If you are going to chill, let the doughball come back to room temperature before trying to shape it (around 2 hours to come back to room temperature)
To Cook
- Heat oven up to it’s hottest setting (500F – 550F)
- Put the rack in the middle of the oven
- Working with one doughball at a time on a floured surface, gently stretch the dough into a 10″ – 12″ circle
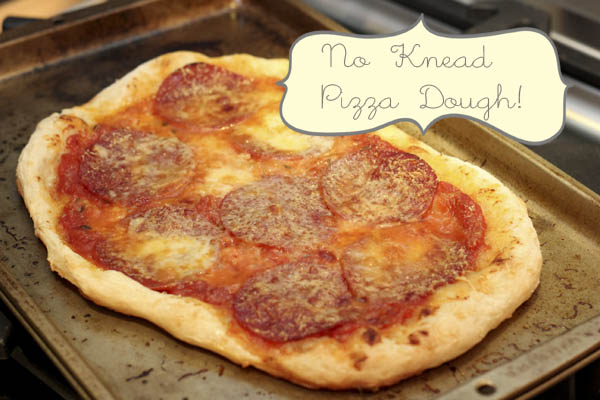
- Place on baking sheet, top with your favourite toppings and cook for 15 minutes.
Notes: I did chill the dough in advance and it worked out fine. Bon Appétit suggests cooking for 10 minutes, but we found 15 minutes worked much better. We topped our pizzas with toppings from our favourite Italian store here in Montreal which is The Italian Pantry in NDG. You could go a whole lot healthier though with a pile of veggies. My pizzas were roughly oblong which was fine. I just pulled them apart to shape them – no rolling pins were used.


Michelle Little
Writer & Photographer


Superb pizza. I want to try some of these!
Pizza Delivery
I love the pizza so good. Keep posting!
” rel=”nofollow”>catering service philippines