
Anyone from the prairies would be unsurprised that a prairie girl like me is of a Ukrainian background (and Norwegian which also features pretty largely out there). I grew up eating Ukrainian foods on special occasions – mostly Christmas. Of course, one of the big features of this meal or any Ukrainian meal is the pyrogies. My husband and I had tried making pyrogies a while back and it was a disaster – about 2 hours, a dozen pyrogies and they all fell apart in the pot. Having my mom visit over the Christmas period was a perfect chance for me to give it another go, and carefully take down all her tricks. It is still a slog (it took us 2 hours) but we had pretty much complete success. For anyone ambitious enough to make their own, here is a detailed instruction set on how to do it.
I enjoyed the process, but would only consider making these about once a year (just long enough for me to forget how long it takes!). If anyone knows of anyone selling decent pyrogies in Montreal, please let me know as I am sure these will run out fairly soon!
And thanks Mom for your tricks and patience!
Pyrogies
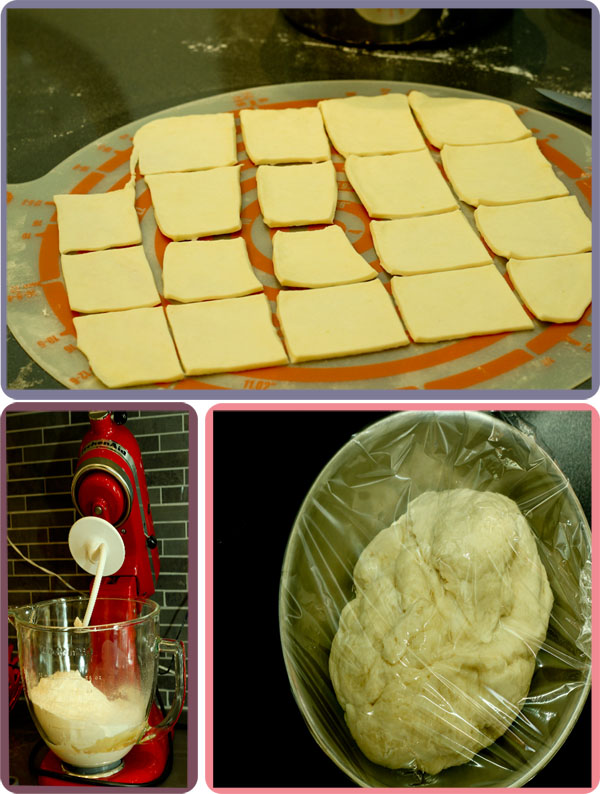
- Mix all ingredients at once
- Using the dough hook in a mixer (or knead) mix until the dough is smooth. In my Kitchen Aid mixture it took about 30 seconds
- Put the 1 tsp oil in the bottom of a bowl and place your dough in a ball in the bowl coating it in the oil so it doesn’t dry out. Cover with plastic wrap and let sit on the counter for at least 30 minutes.
- Note – I doubled the dough recipe, but put through only one batch at a time in the mixer.

- On low heat cook the butter, oil, and onions together. The onions should soften without browning if possible.
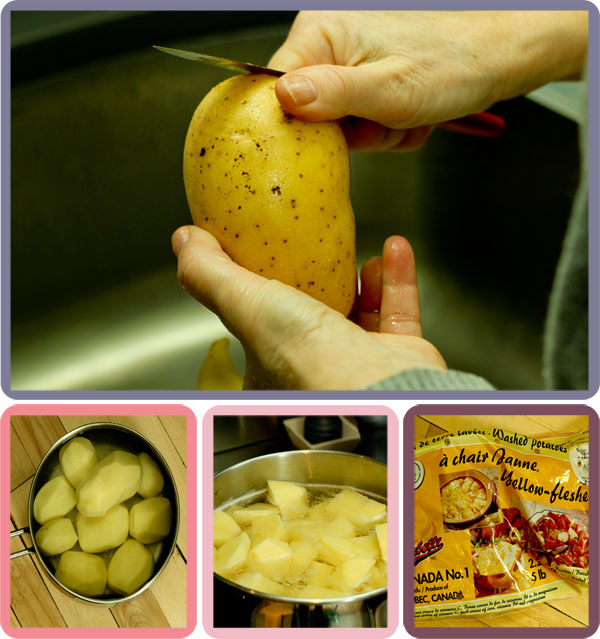
- Peel and cook the potatoes in boiling water until soft as you would to make mashed potatoes.
- Mash and add the 1/4 cup cooked onion mixture.
- Add salt and pepper to taste
- More of the onion mixture can be added if it feels necessary. The potato mixture should taste pleasant but not have an overwhelming taste of onions.
- Roll out the dough quite thin as once cut it will contract back again. Try and roll the dough into a rectangle.
- Trim away any funny edges from the rectangle.
- Cut squares from the dough of about 3″ by 3″. You could also punch out circles, but this seems easier.
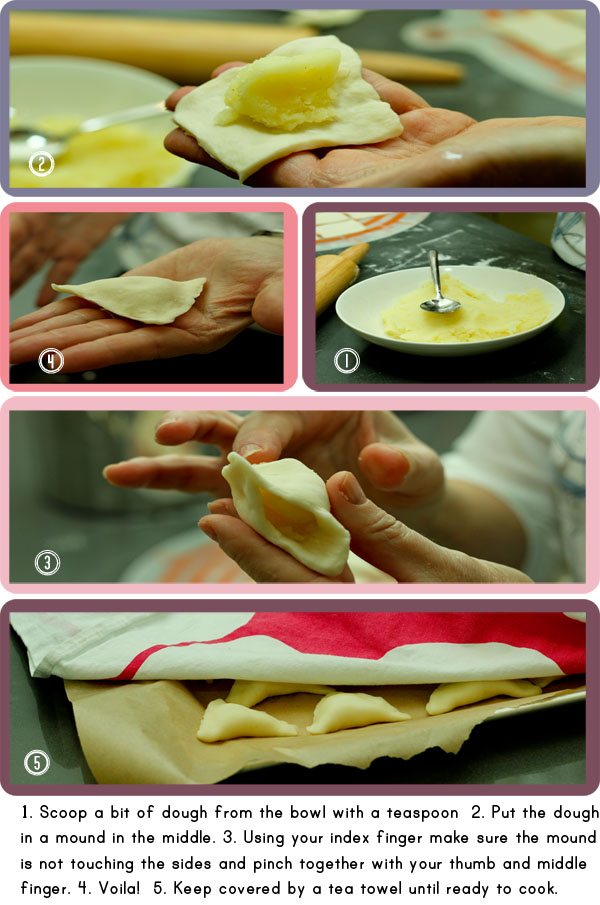
- Place a bit of your potato mixture in a bowl and using a teaspoon scoop up a SMALL amount and place in the middle of the pyrogie (see troubleshooting below for the reason why).
- Using your index finger make this mound of potato into a compact ball.
- Using your thumb and middle finger pinch together two opposite corners. Push in any potato coming out either side with your index finger, and continue to pinch along each side with your thumb and middle finger slowly enclosing the pyrogie.
- Don’t be afraid to really pinch the sides together well so that there remains no trace of the connection between the two sides.
- If you get any potato in between the dough, the pyrogie will not seal.
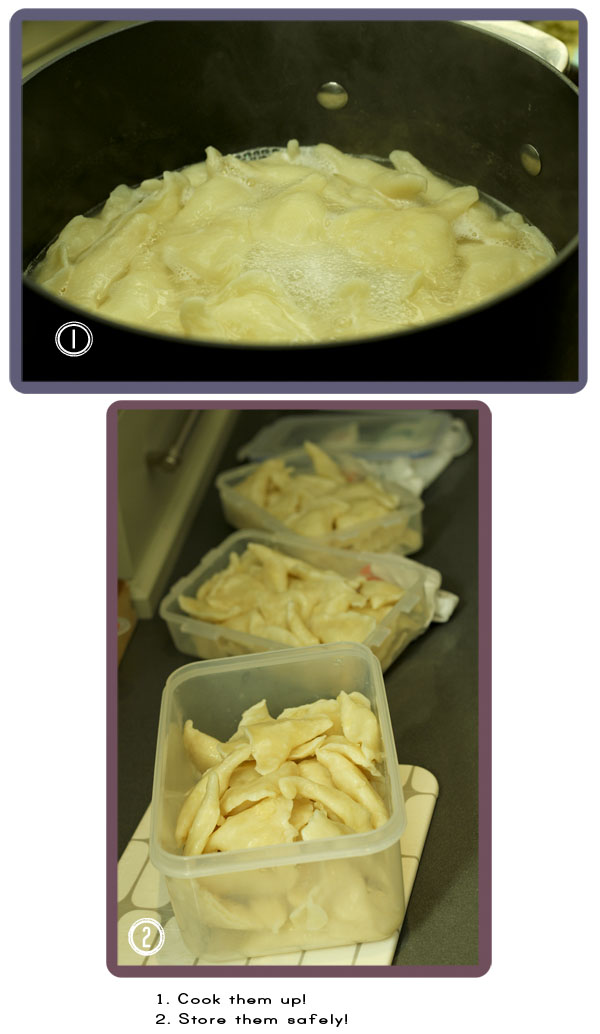
- Carefully lower the pyrogies one at a time into a large pot of boiling water. Let the pyrogies cook for 4-5 minutes after the water starts boiling again.
- Remove from the water with a slotted spoon and let drain.
- Put in a container to store, layering pyrogies and the onion mixture. Let cool shaking every once in a while to make sure the pyrogies are not sticking.
- Make sure the pyrogies are well coated in the onion mixture otherwise you will have one large mass.
- To freeze make sure the pyrogies are well coated in the butter mixture or a little extra oil.
- To reheat take the pyrogies out the night before to thaw.
- You can heat the pyrogies up in the microwave or the oven (I suggest 350F). Take them out every once in a while to SHAKE (not stir or the pyrogies will rip apart).
- Add a couple tablespoons of water to the container when you reheat.
- Make sure there is NO potato mixture in the seal
- Really pinch and roll and pinch to make sure it is a good seal
- Use less potato mixture so it doesn’t overflow
- Perhaps your dough is too thin and it is ripping? Take a look
- Really make sure your pyrogies are coated in butter or oil and shake them as they are cooling off to make sure they don’t stick.
- You need to shake quite often as they are reheating as well.


Michelle Little
Writer & Photographer


my husband and i were just talking about how our perogie consumption has significantly decreased since leaving the prairies! thanks for posting this recipe… i’m going to have to attempt to make these.
Looks delicious. Can I place an order? 🙂
Jess – sure you can place an order at $5 a pyrogie! These things are like gold! I can barely bring myself to eat them they were so much labour!
Mina – good luck with the pyrogie making and let me know how it goes!
You can get great pierogies made by some lovely ladies at Wayne’s deli on Centre Street in Pointe St Charles. Take them home and fry them up in the pan and they are so delicious! They have strange hours though, so call first to make sure they are open.
Lovely
not enough water in the pot for rolling boil
YOU CAN ALSO ADD CHEESE TO THE POTATOES I ADD CHEDDAR FETA A AMERICAN CHEESE THEY ARE REALLY LIKE GOLD
Just letting you know that varenyky are not pyrohy. They are two different foods and are made and cooked differently. It would be wonderful if people would get this right. I know that Polish people say pyrogie but if you are Ukrainian that is incorrect.
Thanks for your comment!
On the Canadian Prairies they really are called pyrogies. This may not be ‘correct’ but this is the widely known name both within families and on commercially bought pyrogies.
In western Ukraine, from which the pioneers emigrated to Canada, varenyky are commonly called pyrohy. Why? Who knows? The real pyrih (singular) is a savoury-filled round yeast bread. Somehow on the prairies it went from pyrohy to perogies.
Hi Orysia,
Yes, I have no idea how it happened but if you said the word varenyky on the Canadian prairies, I’m afraid no one would know what you were talking about. Pyrogies though? A winner all-around!
My Hungarian grandma made them just like yours but she had a awesome garlic sauce with it and I was never able to make it the same way she did ,thanks for sharing !
Pingback: Top 8 Food Posts | Roasted